Alexa smart home skills require you to provide OAUTH2 so that users can authorise a skill to access the assumed cloud service powering their lightbulbs or any number of other pointlessly connected devices. This makes sense since OAUTH2 is a standard and secure way to grant access for users from one system to the resources of another. However, with this come a few caveats which are potential blockers for casual skill developers like me. If you’re writing a skill for your own personal use, with no intention of adding it to the store, you still have to have a valid and recognised SSL certificate and a whole OAUTH2 server set up somewhere.
The SSL certificate is easy enough to implement, but it’s a bit of a faff (renewing Let’s Encrypt certs, or paying for cert which needs you to deal with the certificate authorities, send in scans of your passport and other tedious red tape) but – in my opinion anyway – setting up an OAUTH server is even more of a faff. If only there was some way to avoid having to do either of these things….
Using “Login With Amazon” as your OAUTH provider
Since you already have an Amazon account you can use “Login With Amazon” as your skill’s OAUTH server and your normal everyday Amazon account as your credentials. You’re only sharing your Amazon account data with yourself, and even then we can restrict it to just your login ID. You don’t actually need to do anything with the OAUTH token once it’s returned since you’re the only user. I mean, you could if you wanted to, but this HOWTO assumes that you’re the only user and that you don’t care about that sort of thing. We are also going to assume that you have already created the Lambda function and the smart home skill or are familiar with how to do that. This is a bit tricky because you can’t test your smart home skill on a real device until you’ve implemented OAUTH, and you can’t complete the OAUTH set-up until you’ve got the IDs from your Lambda function and skill. If you haven’t written your skill yet, just create a placeholder Lambda function and smart home skill to be going on with.
Much of this information is available from the official Amazon instructions available here: https://developer.amazon.com/public/community/post/Tx3CX1ETRZZ2NPC/Alexa-Account-Linking-5-Steps-to-Seamlessly-Link-Your-Alexa-Skill-with-Login-wit. What follows is a rehash and slight reorganisation of that doc which is hopefully a bit easier to follow.
1. Create a new Login With Amazon Security Profile
From the Amazon Developer Site, go to Apps & Services -> Login With Amazon. Or click https://developer.amazon.com/lwa/sp/overview.html
Click “Create a New Security Profile”. Fill out the form along these lines:

and hit Save.
You should see a message along the lines of “Login with Amazon successfully enabled for Security Profile.”
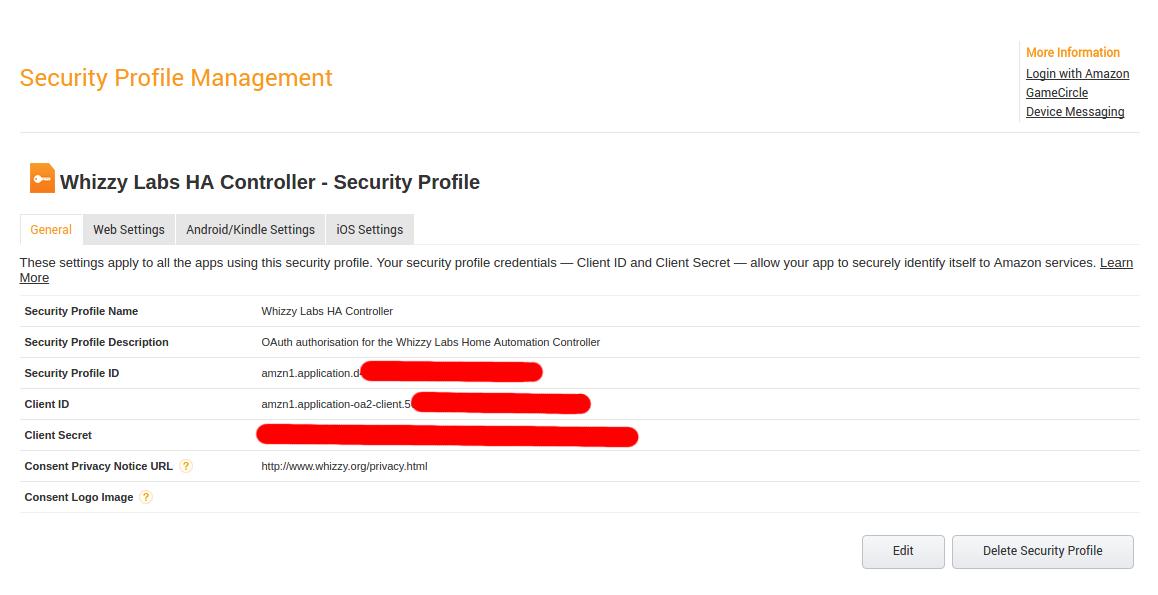
Hover the mouse over the cog icon to the right of your new security profile and choose “Security Profile”.
Copy your “Client ID” and “Client Secret” and paste it in to a notepad. You’ll need this again shortly.
2. Configure your skill to use Login With Amazon
Back in the Developer Console, navigate to the Configuration page for your skill. (Click on your skill, then click on Configuration). You need to enable “Account Linking” and this will then show the extra boxes discussed below.
In to the “Authorization URL” box you should put:
https://www.amazon.com/ap/oa/?redirect_url=
and then copy the Redirect URL from further down the page and append it to the end of the Authorization URL. For example:
https://www.amazon.com/ap/oa/?redirect_url=https://layla.amazon.com/api/skill/link/1234ABCD1234AB
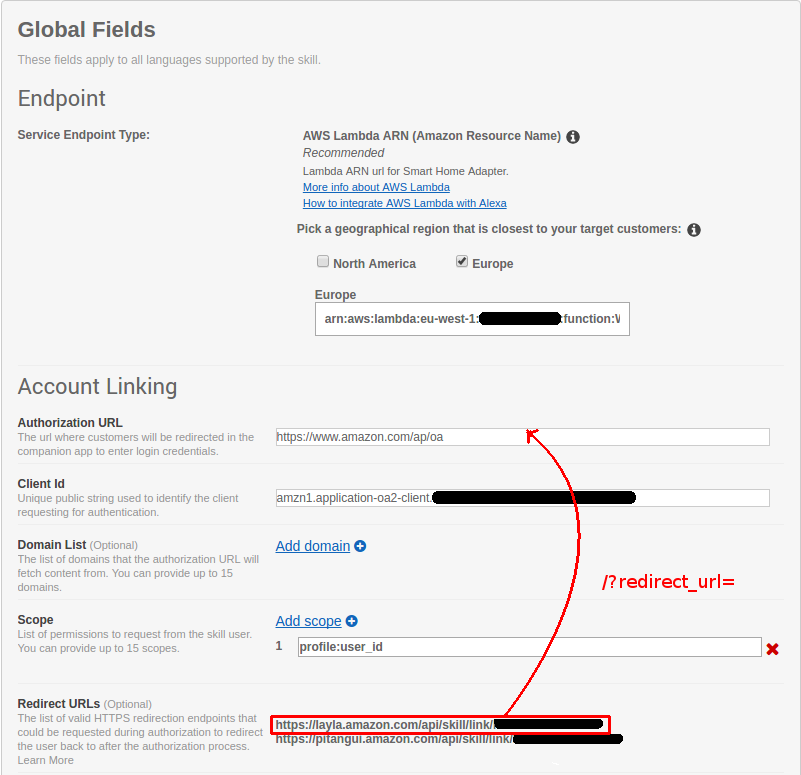
As far as I can tell Layla is for UK/Europe and Pitangui is for the US. Use the appropriate one for you. Also, keep a note of the redirect URL in your notepad, you will need this again later.
In to the “Client Id” box paste your client id from step 1.
You can leave “Domain List” blank for now.
For “Scope” I suggest you use:
profile:user_id
This will give your Alexa Skill access to a minimal amount of information about you from Amazon, in this case just a user_id. That user ID is unique to your app so can’t be used by other apps or to identify that user elsewhere. Since you don’t really have any customers for your skill, only you, there is no reason to provide access to any other information.
Further down the page you need to configure the Grant Type:
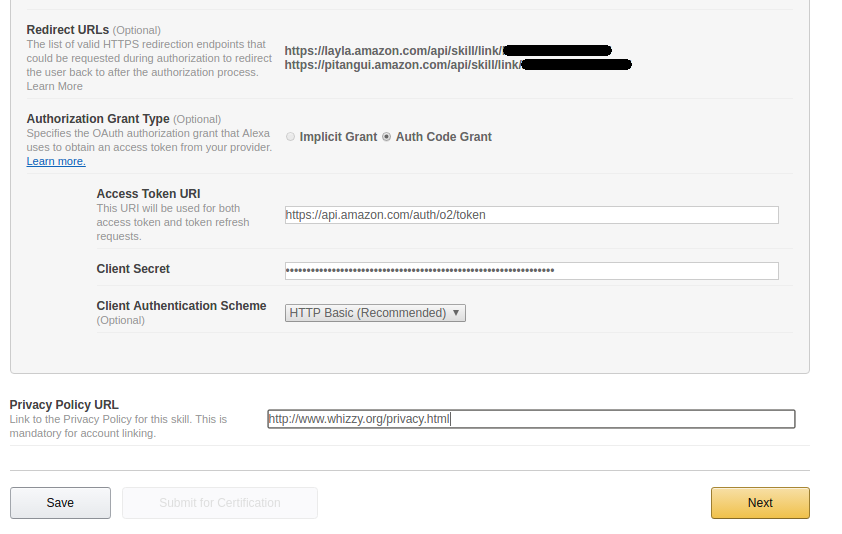
Select an “Auth Code Grant”
Set the “Access Token URI” to:
https://api.amazon.com/auth/o2/token
and in to “Client Secret” paste your secret from step 1.
You must include a link to your “Privacy Policy URL“. Since you are the only person who cares you could host a blank file somewhere, or maybe link to a Rick Astley video on YouTube?
Finally hit Save.
3. Link Login With Amazon back to your Skill
Head back to the Login With Amazon page: https://developer.amazon.com/lwa/sp/overview.html
Hover over the cog of your Security Profile and choose Web Settings:
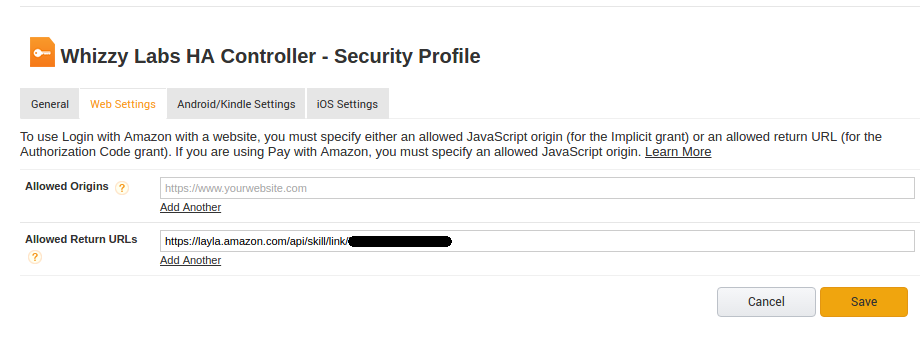
In to the “Allowed Return URLs” box paste your Redirect URL from step 2 and hit save.
4. Login to Amazon from your skill and do the OAUTH dance
From the Alexa app on your phone navigate to your new Smart Home Skill and you see that it says “Account Linking Required“.
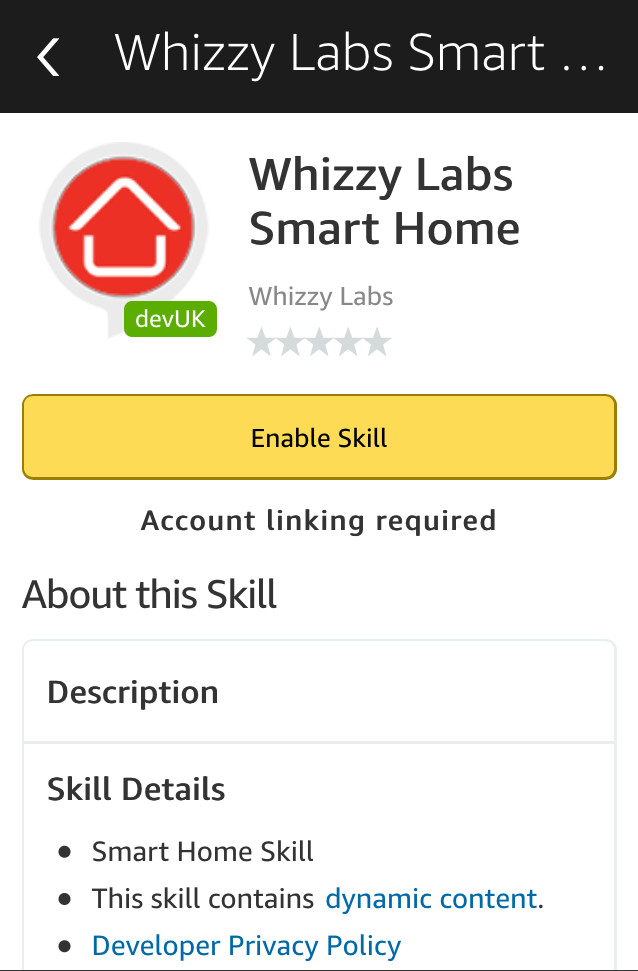
Click “Enable Skill” and you’ll be asked to login with your Amazon credentials:
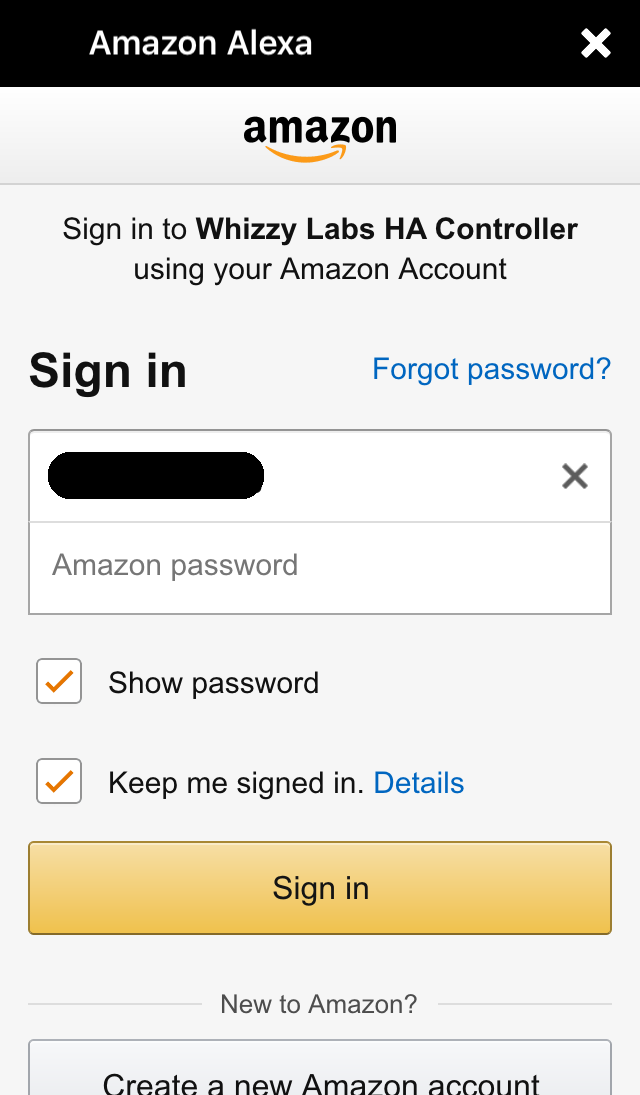
Once you log in you should see a success message:
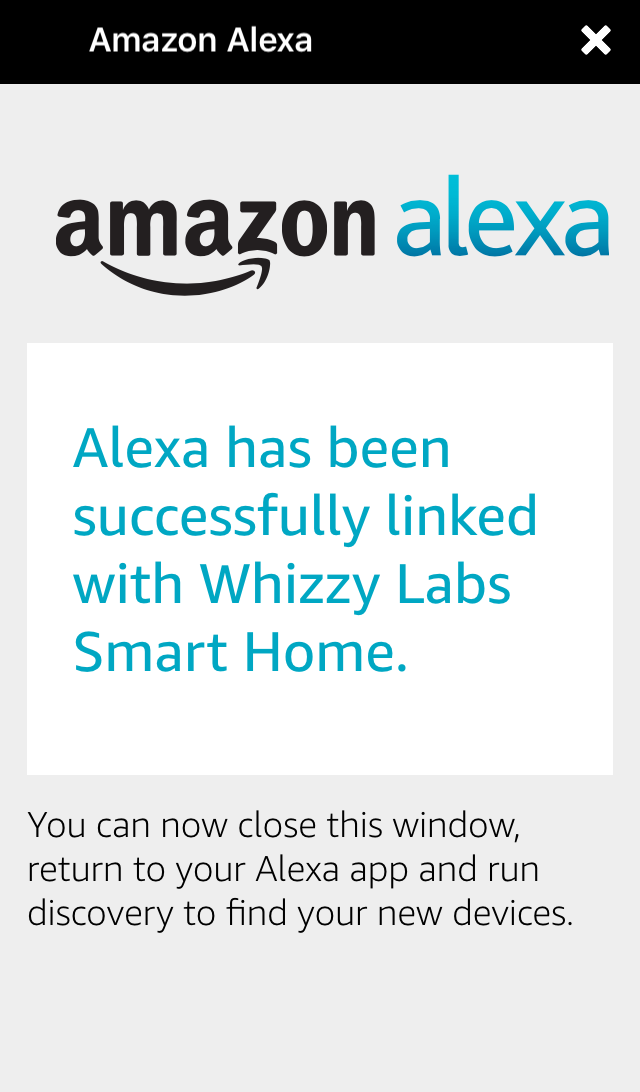
And you’re done.
Additional: Here’s a post on how to read the users details from Amazon once they are linked: https://www.whizzy.org/2017/03/retrieving-user-profile-data-from-login-with-amazon-on-alexa/