Skill level: Easy
My home automation systems use two mechanisms for communication: Ethernet (both wired and wireless) and 433MHz OOK radio.
433MHz transmitters are readily available and are cheap but unreliable. Wifi enabled MCUs such as the ESP8266 are also cheap (coming in at around the same cost as an Arduino clone, a 433MHz transmitter and a bag of bits to connect them together), they are reliable enough but extremely power hungry. If I can plug a project into the mains then I’ll use an ESP8266 and a mobile phone charger for power, if the project needs to run off batteries then a 433MHz equipped Arduino is the way I’ve gone.
Like most people playing with 433MHz radio I found reliability and range of the radio link to be super flaky. I’ve finally got a more-or-less reliable set-up:
- A full wave dipole antenna at the receiver
- A high quality receiver from RF Solutions in place of the cheap ones which are bundled with transmitters. A decent receiver on eBay
- A big capacitor on the transmitter. I saw the frequency and amplitude drifting massively during transmission. Adding a 470µF cap helps. Allow time for the cap to charge and the oscillator to stabilise, a few seconds delay seemed to do the trick.
- Using the RCSwitch library on the transmitter:
RCSwitch mySwitch = RCSwitch();
mySwitch.setProtocol(2); // Much longer pulse lengths = much better range?
mySwitch.setRepeatTransmit(20); // Just brute-force it!
With this setup I can get receive a 24bit number from an Arduino running off 2 AA batteries and a coiled 1/2 wave antenna from about 5 meters indoors through walls. That’s still poor, but it does the job. Increasing the voltage to the transmitter would probably help.
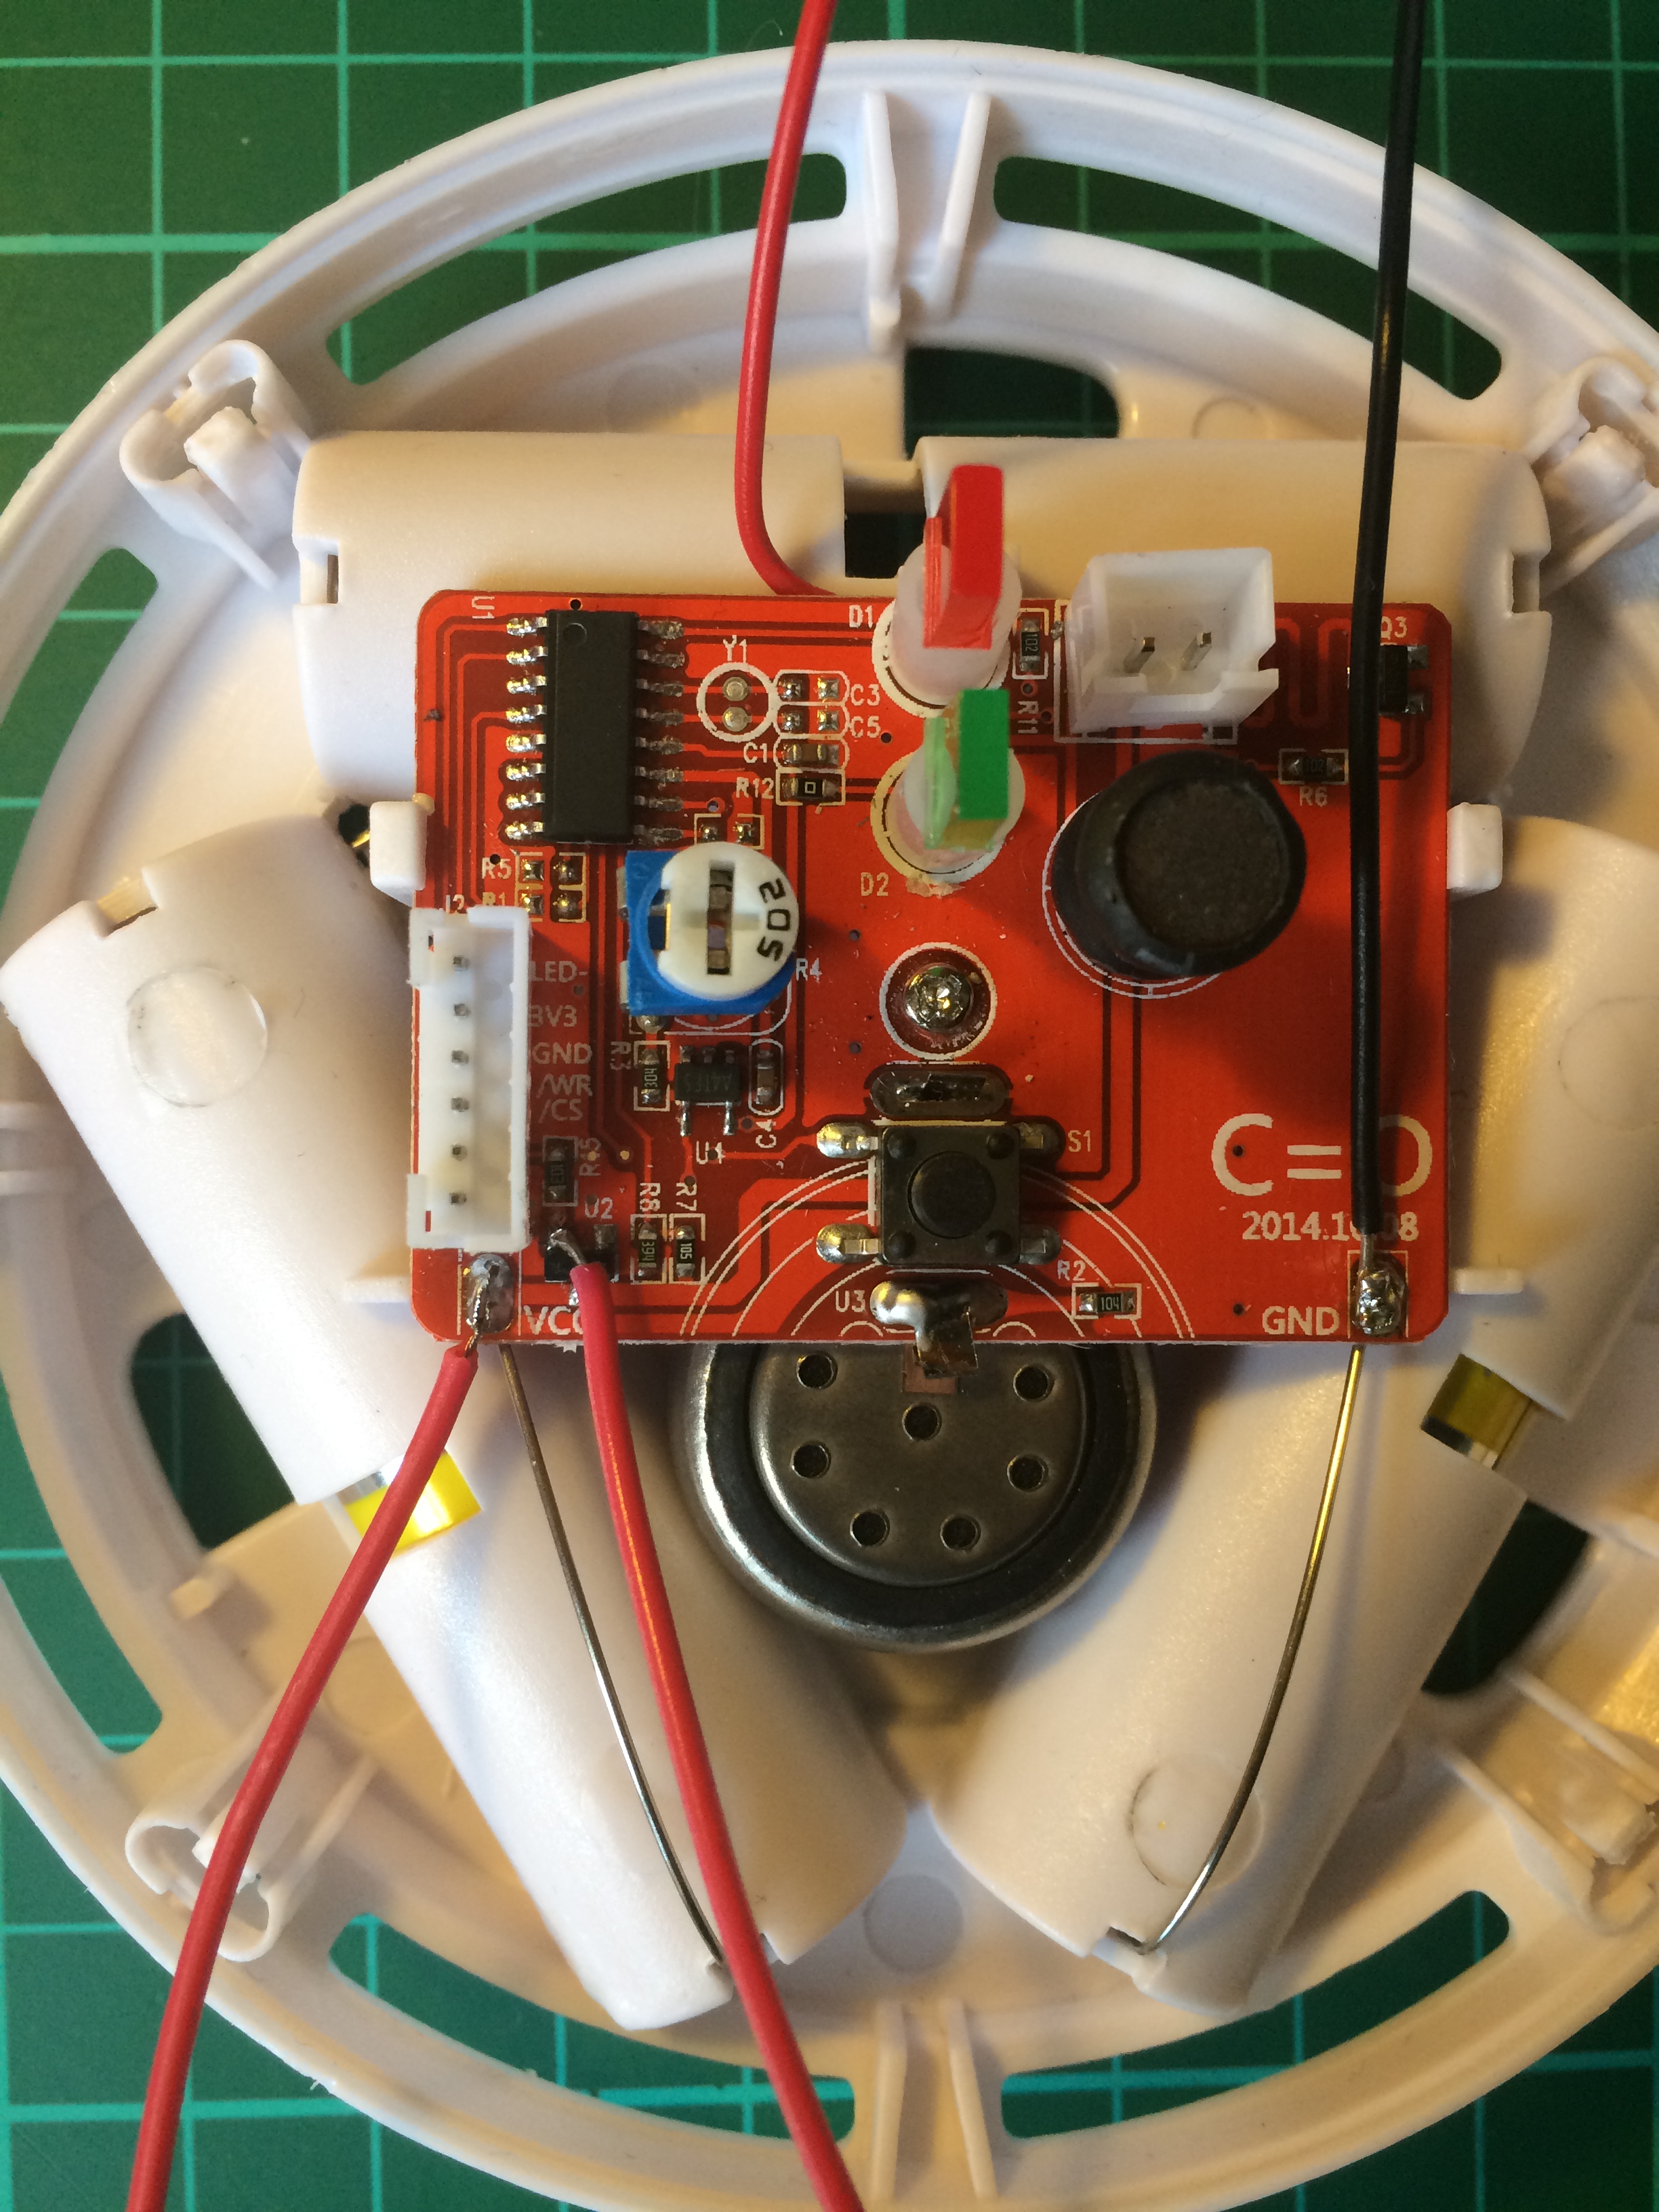
Once you have a reliable 433MHz receiver setup then you can also buy off the shelf 433MHz enabled home automation gizmos like this smoke alarm or these door sensors. They have a set of jumpers inside where you can set an ID, which is essentially the same 24bit number that RCSwitch lets you transmit. For what it’s worth I also have kite-marked smoke detectors in my house, but from the testing I’ve done with a bit of smoldering paper the cheap imports work just fine.
I couldn’t find a cheap Carbon Monoxide which also has 433MHz support so I thought I’d quickly hack one together out of this Carbon Monoxide detector and an Arduino clone and 433MHz radio:
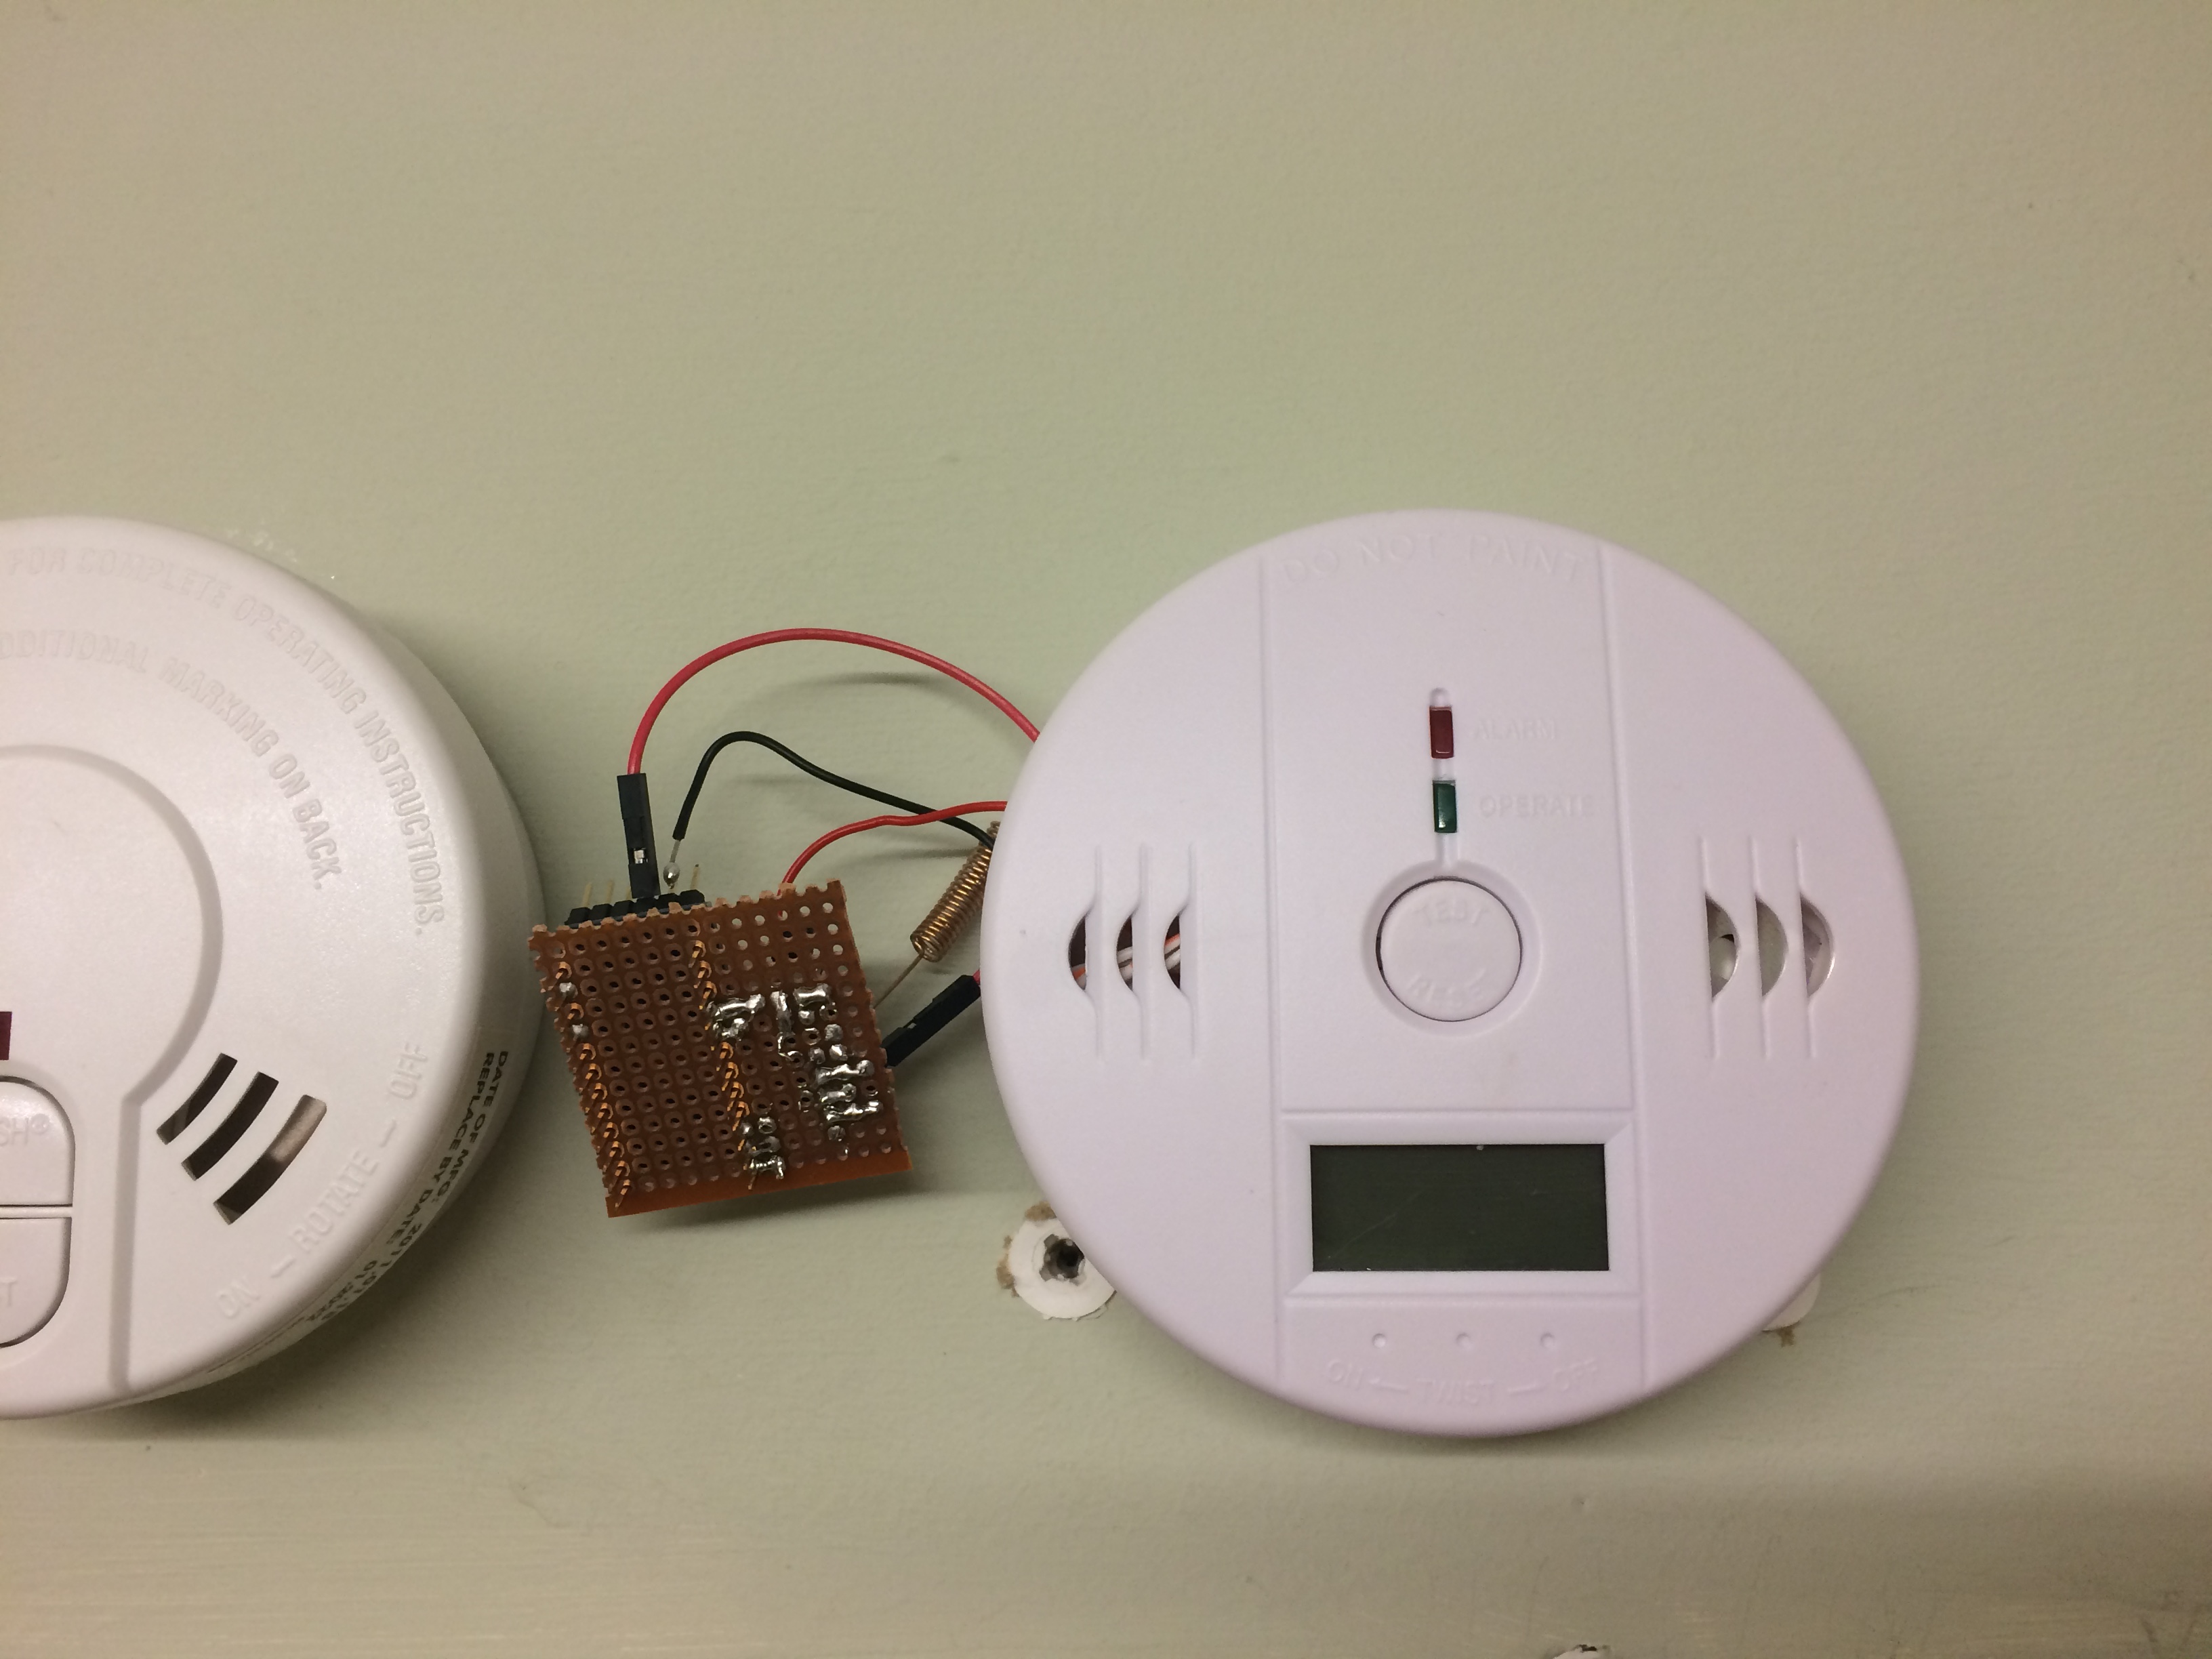
You can barely notice it!
It’s certainly untidy, but it does the job. If I had PCB facilities at home I’m fairly sure it could be made to fit inside the alarm, along with some more holes in the case for ventilation.
The premise is simple enough. The Arduino is powered by the 3v3 regulator on the CO alarm PCB. The cathode of the red alarm LED is connected to pin 2 of the Arduino as an external interrupt. When the pin goes low the Arduino wakes up and sends it’s 24bit ID number over the radio which is picked up by the receiver which sends an SMS alert, switches the boiler off, etc. I’ve connected the radio transmitter to directly to the 3 x AA batteries (4.5 volts) via a transistor which is switched by a pin on the Arduino. In standy-by mode the additional equipment draws a fraction of a milliamp and so I’m not worried about draining the batteries faster.
As with the smoke alarms, this is not my only source of Carbon Monoxide detection. I’ve yet to test it’s sensitivity. This is considered to be a “well, if it works, and it turns the boiler off automatically then it’s certainly worth a go, but I’m not relying on it” project.